Docker containers make it easy to install Odoo version 11. When you already have Docker installed, you will be running Odoo 11 in a couple of minutes.
Let's begin.
Note:
This article is for Odoo version 11.
A new article for Odoo version 12 is available here: "Odoo 12 in Docker Container".
The container basics
We are creating two containers:
One container for database. Odoo uses PostgreSQL, so we select PostgreSQL version 10 image.
One container for Odoo. We use Odoo version 11.0 image for this. In this blog post I use my own Docker image that has Odoo nightly updates so we will get up-to-date Odoo image. The official Docker Odoo image is currently updated quite unfrequently.
You may ask why are we creating two separate containers. Could we just install the PostgreSQL and Odoo in the same container? Yes we could, but this would not be the containerized way of doing things. With containers you are supposed to separate things in own containers. This is the right pattern with containers.
You could do a very simple "hello-odoo-world" demo without persistent volumes. We want to do a real-life environment with persistent volumes. With volumes we can handle data life-cycle separate from container life-cycle. For both containers we create persistent storage volume for data. Odoo uses it for attachments and sessions, and PostgreSQL saves the database there. Odoo image has also another volume for extra-addons -folder. It is used for local Odoo modules. Installing Odoo modules in container is not covered in this article.
You will need persistence e.g. in these cases:
Container recreation. If you recreate the container, it loses internal data. This is why containers need persistent storage to persist state.
Scaling-out containers and sharing state between them. If you need to scale-out your compute power by adding multiple nodes of Odoo server containers, you need a way to share the Odoo state between running containers.
Different container systems provide different means of persisting data. Here we use Docker volumes. For Google Container Engine (GKE) or Azure Kubernetes Engine (AKE) you can use services provided by that platform.
Note: If you are experiencing missing images and ir_attachment related errors, you probably have problems with persisting the Odoo filestore. The symptoms are that everything works fine until you restart your Docker or your Odoo container. You find errors in Odoo containner logs from file ir_attachment.py saying "FileNotFoundError: [Errno 2] No such file or directory." If you have these errors, make sure you have used persistent volumes explained on this page in your container.
Network
Let's create a Docker network to connect our database and Odoo.
docker network create --driver bridge unkkuri-odoo-nw
Database container
Fist we create a container for our database. Let's create a volume to persist database:
docker volume create --name unkkuri-db-data
Next let's create and run the database container. Note that we use the PostgreSQL version 10. I don't yet recommend using this Postgres version for production workloads at the moment (January 2018).
docker run -d --name unkkuri-db \Tip: If you are using Linux or Mac, use character \ at the end of the lines to continue command on the next line.
--env POSTGRES_USER=odoo --env POSTGRES_PASSWORD=unkkuri-secret-pw \
--network=unkkuri-odoo-nw --mount source=unkkuri-db-data,target=/var/lib/postgresql/data \
library/postgres:10.0
If you are using Windows PowerShell, use character ` at the end of the line.
If you are using Windows Command Line, use character ^ at the end of the line.
p.s. Don't ask why all the environments are different...
You can check that Postgres started successfully by viewing the container logs:
docker logs unkkuri-db
You should see something like this in the end of the log:
...
2018-01-07 17:14:47.340 UTC [1] LOG:  database system is ready to accept connections
Now we have the database running. That was easy!
Next Odoo container
Then it is time to start Odoo. We will do it the same way so that we have separate persistent storage.
docker volume create --name unkkuri-odoo-data
docker volume create --name unkkuri-odoo-extra-addons
And run Odoo:
docker run -d --name unkkuri-odoo --link unkkuri-db:db -p 8069:8069 \
  --network unkkuri-odoo-nw \
  --mount source=unkkuri-odoo-data,target=/var/lib/odoo \
  --mount source=unkkuri-odoo-extra-addons,target=/mnt/extra-addons \
  --env POSTGRES_PASSWORD=unkkuri-secret-pw \
  veivaa/odoo:11.0
Some explanation of the parameters:
Parameter --mount is used to connect Docker persistent volumes to the container. It is recommended to use the mount and not the old --volume (-v) switch.
Parameter -p is used to publish port from container. We publish the port 8069 that is exposed from the Odoo image.
Parameter --env is used to set environment variables in the container. We set PostgreSQL password to the same we used in the database container.
The Odoo container image used here is veivaa/odoo:11.0. It is Odoo version 11.0 latest nightly build from nightly.odoo.com. You can also use the official Odoo container image library/odoo:11.0.
Let's check the logs to make sure everything is running:
docker logs unkkuri-odoo
You should see the Odoo logs and in the end you should see these lines:
2018-01-07 17:16:46,578 1 INFO ? odoo: Odoo version 11.0-20171030
2018-01-07 17:16:46,579 1 INFO ? odoo: Using configuration file at /etc/odoo/odoo.conf
2018-01-07 17:16:46,579 1 INFO ? odoo: addons paths: ['/var/lib/odoo/addons/11.0', '/mnt/extra-addons', '/usr/lib/python3/dist-packages/odoo/addons']
2018-01-07 17:16:46,579 1 INFO ? odoo: database: odoo@db:5432
2018-01-07 17:16:46,591 1 INFO ? odoo.service.server: HTTP service (werkzeug) running on 0.0.0.0:8069
2018-01-07 17:16:46,743 1 INFO ? odoo.addons.base.ir.ir_actions_report: Will use the Wkhtmltopdf binary at /usr/local/bin/wkhtmltopdf
Now we have Odoo running in a Docker container. It's time to Odoo!
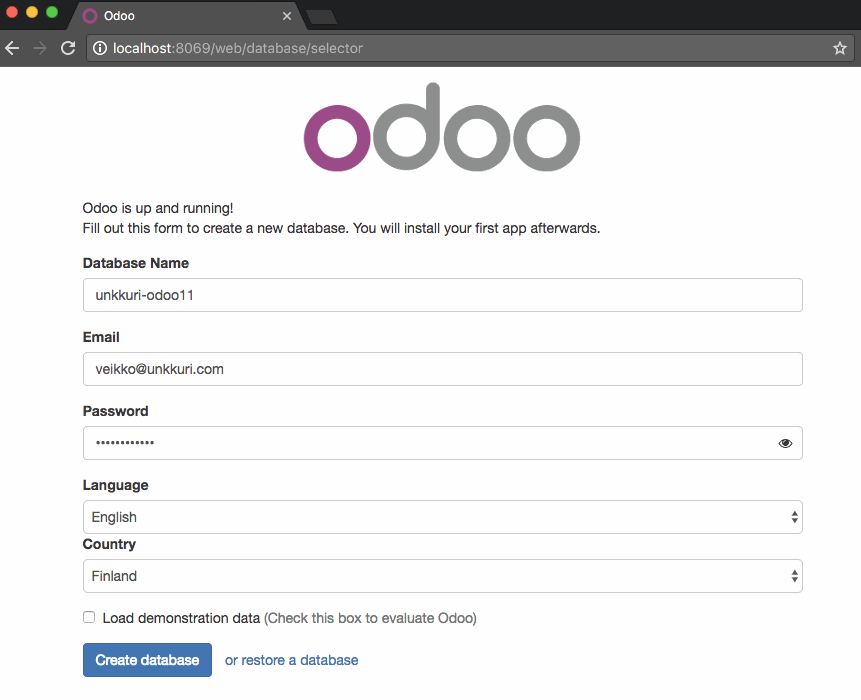
Time to Odoo
We published Odoo web service in port 8069 so you can navigate to http://localhost:8069. If you use Docker in virtual machine you have to change localhost to the ip-address of your Docker virtual machine, e.g. http://192.168.0.1:8069.
Odoo starts with a welcome page and you are able to create your Odoo database. The creation takes less than a minute. After that you can install apps and start using Odoo.
After you create the database, remember to change the master password if your Odoo web pages are accessible to other users.
Starting and stopping containers
You can start and stop the containers without losing your Odoo contents. The configuration used above uses separate Docker volumes to store data that is meant to be persistent. In Odoo container this data is filestore and addon modules.
You can see running containers with this command:
docker ps
This command shows only the running containers. If your container is not running, you can see is with -a switch that shows all containers regardless of the status:
docker ps -a
You can stop the container with this command:
docker stop unkkuri-odoo
And you can restart the container like this:
docker start unkkuri-odoo
After you restart your computer or Docker, you will have the container stopped and you need to restart both containers:
docker start unkkuri-db
docker start unkkuri-odoo
Updating or recreating the container
Many times you want to update the Odoo container with a newer version of Odoo. This can be done with these steps:
Stop and remove old Odoo container.
Pull newer version of Odoo image.
Recreate Odoo container.
Run these steps with these commands:
docker stop unkkuri-odoo
docker rm unkkuri-odoo
docker pull veivaa/odoo:11.0
docker run -d --name unkkuri-odoo --link unkkuri-db:db -p 8069:8069 \
 --network unkkuri-odoo-nw \
 --mount source=unkkuri-odoo-data,target=/var/lib/odoo \
 --mount source=unkkuri-odoo-extra-addons,target=/mnt/extra-addons \
 --env POSTGRES_PASSWORD=unkkuri-secret-pw \
 veivaa/odoo:11.0
Note: Upgrading Odoo major version requires running migration scripts. Major version change is for example upgrading from Odoo version 10 to Odoo version 11. Upgrades inside one major version can normally be done, e.g. upgrade from Odoo version 11 nightly build 20180501 to Odoo version 11 nightly build 20180515.
When it is time to clean up
When you are done with testing, you can delete the docker containers. Do this by stopping the running containers, removing containers, volumes and network. This removes all the data you created in Odoo. To delete everything type:
docker stop unkkuri-odoo
docker rm unkkuri-odoo
docker volume rm unkkuri-odoo-data
docker volume rm unkkuri-odoo-extra-addons

docker stop unkkuri-db
docker rm unkkuri-db
docker volume rm unkkuri-db-data

docker network rm unkkuri-odoo-nw
Odoo source code can be found from GitHub here: https://github.com/odoo/odoo. You can find also the official Odoo Docker images in Odoo GitHub repository here: https://github.com/odoo/docker.
The nightly Odoo image used in this article can be found in Docker Store at https://store.docker.com/community/images/veivaa/odoo.
Docker Store has the official Odoo container here: https://hub.docker.com/_/odoo/. The image is based on the Dockerfile found in odoo/docker repository. PostgreSQL image is also available in Docker Hub: https://hub.docker.com/_/postgres/.
If you have questions about how to use Odoo or container technologies in your business, I am happy to answer them and help you.
Happy Odooing!